Recipe Link to heading
- Mount the BOSS RC-30 filesystem
- Copy audio files from the RC-30 to the computer
- Compress and normalize audio files
Ingredients Link to heading
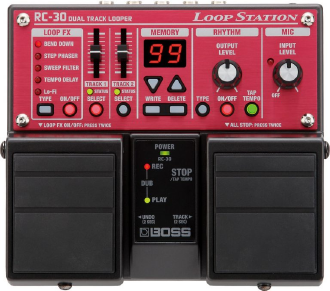
- 1x BOSS RC-30 unit
- 1x USB-A to USB-B cable
- 1x Personal Computer featuring:
Preparin’ and bakin' Link to heading
1. Mounting the RC-30 filesystem Link to heading
If using a file manager such as Nautilus or Dolphin, the RC-30 filesystem should be automatically mounted when the USB cable is plugged.
If using PCManFM, you might need to install gvfs before being able to mount the RC-30 filesystem.
If mounting manually or using a udisks helper such as udiskie, you will need to create a mount point before being able to mount the RC-30 filesystem.
In any case: note the path (directory) where the filesystem has been mounted! We’ll be using it later in scripts 😉
Using udiskie:
$ udiskie-mount -a
mounted /org/freedesktop/UDisks2/block_devices/sde1 on /run/media/virtualtam/BOSS_RC-30
Let’s see what we have here!
$ cd /run/media/virtualtam/BOSS_RC-30
$ tree
.
└── ROLAND
    ├── DATA
    │   ├── MEMORY.RC3
    │   └── SYSTEM.RC3
    └── WAVE
        ├── 001_1
        │   └── 001_1.WAV
        ├── 001_2
        ├── 002_1
        │   └── 002_1.WAV
        ├── 002_2
        ├── 003_1
        │   └── 003_1.WAV
        ├── 003_2
        ├── 004_1
        │   └── 004_1.WAV
        ├── 004_2
        ├── 005_1
        │   └── 005_1.WAV

        ...

        ├── 096_1
        ├── 096_2
        ├── 097_1
        ├── 097_2
        ├── 098_1
        ├── 098_2
        ├── 099_1
        └── 099_2

201 directories, 34 files
2. Copying files from the RC-30 to the computer’s filesystem Link to heading
The RC-30 stores audio data as stereo WAV files, with one file per loop track. By default, empty folders corresponding to the 99 available loops, and 2 tracks per loop, are created.
The WAV files are stored according to the following pattern:
<MOUNT_POINT> / ROLAND / WAVE / <LOOP_NO>_<TRACK_NO> / <LOOP_NO>_<TRACK_NO>.WAV
We are now going to:
- copy WAV files from the RC-30 filesystem to the local filesystem;
- flatten the directory structure, i.e. get rid of empty and extra directories.
To avoid transferring the same files every time the script is run, we will use the rsync utility to make incremental, recursive transfers:
$ cd
$ mkdir rc30
$ cd rc30
$ rsync \
    -a \
    -v \
    --perms \
    --chmod=D2775,F664 \
    --prune-empty-dirs \
    /run/media/virtualtam/BOSS_RC-30/ROLAND/WAVE/ WAV/

building file list ... done

sent 3,193 bytes  received 12 bytes  6,410.00 bytes/sec
total size is 139,511,764  speedup is 43,529.41
rsync option rundown:
-a: archive mode, recursively finds files and directories-v: print file names to the console--perms: allows setting directory and file permissions on the destination end (local filesystem)--chmod=D2775,F664: sets permissions for directories and files--prune-empty-dirs: do not create empty directories on the destination end (local filesystem)
3. Processing audio files with FFmpeg Link to heading
If you’re OK with keeping uncompressed WAV files, you can skip this step. Congrats, you’re done!
But if you’re like me and you want to store your loops somewhere in a more storage-efficient manner, read on!
FFmpeg provides a collection of utilities to manipulate media (audio, video) files, and will allow us to:
- detect the peak volume of an audio file;
- encode WAV files to a compressed, lossy audio format and apply normalization.
In particular, take a look at:
- the FFmpeg AudioVolume wiki page;
- the How can I normalize audio using ffmpeg? thread on SuperUser.
3.1 Getting peak volume information with FFMpeg Link to heading
$ ffmpeg \
    -i 002_1.WAV \
    -af "volumedetect" \
    -f null \
    /dev/null \
    2>&1

ffmpeg version 3.4.1 Copyright (c) 2000-2017 the FFmpeg developers
  built with gcc 7.2.1 (GCC) 20171128
  configuration: --prefix=/usr --disable-debug --disable-static --disable-stripping --enable-avisynth --enable-avresample --enable-fontconfig --enable-gmp --enable-gnutls --enable-gpl --enable-ladspa --enable-libass --enable-libbluray --enable-libfreetype --enable-libfribidi --enable-libgsm --enable-libiec61883 --enable-libmodplug --enable-libmp3lame --enable-libopencore_amrnb --enable-libopencore_amrwb --enable-libopenjpeg --enable-libopus --enable-libpulse --enable-libsoxr --enable-libspeex --enable-libssh --enable-libtheora --enable-libv4l2 --enable-libvidstab --enable-libvorbis --enable-libvpx --enable-libwebp --enable-libx264 --enable-libx265 --enable-libxcb --enable-libxml2 --enable-libxvid --enable-shared --enable-version3
  libavutil      55. 78.100 / 55. 78.100
  libavcodec     57.107.100 / 57.107.100
  libavformat    57. 83.100 / 57. 83.100
  libavdevice    57. 10.100 / 57. 10.100
  libavfilter     6.107.100 /  6.107.100
  libavresample   3.  7.  0 /  3.  7.  0
  libswscale      4.  8.100 /  4.  8.100
  libswresample   2.  9.100 /  2.  9.100
  libpostproc    54.  7.100 / 54.  7.100
Guessed Channel Layout for Input Stream #0.0 : stereo
Input #0, wav, from '002_1.WAV':
  Duration: 00:00:21.08, bitrate: 1411 kb/s
    Stream #0:0: Audio: pcm_s16le ([1][0][0][0] / 0x0001), 44100 Hz, stereo, s16, 1411 kb/s
Stream mapping:
  Stream #0:0 -> #0:0 (pcm_s16le (native) -> pcm_s16le (native))
Press [q] to stop, [?] for help
Output #0, null, to '/dev/null':
  Metadata:
    encoder         : Lavf57.83.100
    Stream #0:0: Audio: pcm_s16le, 44100 Hz, stereo, s16, 1411 kb/s
    Metadata:
      encoder         : Lavc57.107.100 pcm_s16le
Invalid return value 0 for stream protocol
    Last message repeated 1 times
size=N/A time=00:00:21.07 bitrate=N/A speed=1.96e+03x
video:0kB audio:3631kB subtitle:0kB other streams:0kB global headers:0kB muxing overhead: unknown
[Parsed_volumedetect_0 @ 0x5648d7b801a0] n_samples: 1858880
[Parsed_volumedetect_0 @ 0x5648d7b801a0] mean_volume: -28.0 dB
[Parsed_volumedetect_0 @ 0x5648d7b801a0] max_volume: -14.3 dB
[Parsed_volumedetect_0 @ 0x5648d7b801a0] histogram_14db: 6
[Parsed_volumedetect_0 @ 0x5648d7b801a0] histogram_15db: 131
[Parsed_volumedetect_0 @ 0x5648d7b801a0] histogram_16db: 532
[Parsed_volumedetect_0 @ 0x5648d7b801a0] histogram_17db: 1852
As we can see, this output is quite verbose; the line we are interested in is:
[Parsed_volumedetect_0 @ 0x5648d7b801a0] max_volume: -14.3 dB
And the value we’re looking for is:
-14.3
To get this value, we need to filter the output of the ffmpeg command:
$ ffmpeg -i 002_1.WAV -af "volumedetect" -f null /dev/null 2>&1 \
    | grep max_volume \
    | cut -d ' ' -f 5

-14.3
3.2 From WAV to OGG Vorbis Link to heading
OGG Vorbis is an Open Source lossy audio format that provides an excellent audio quality to file size ratio -I’ve been using it for ages to store loads of music on mobile music players and send demos by email!
If for some reason, Vorbis does not suit you, it can be replaced by any other format supported by FFmpeg, provided the appropriate codecs have been installed:
$ ffmpeg \
    -i 002_1.WAV \
    -af "volume=14.3dB" \
    002_1.ogg

ffmpeg version 3.4.1 Copyright (c) 2000-2017 the FFmpeg developers
  built with gcc 7.2.1 (GCC) 20171128
  configuration: --prefix=/usr --disable-debug --disable-static --disable-stripping --enable-avisynth --enable-avresample --enable-fontconfig --enable-gmp --enable-gnutls --enable-gpl --enable-ladspa --enable-libass --enable-libbluray --enable-libfreetype --enable-libfribidi --enable-libgsm --enable-libiec61883 --enable-libmodplug --enable-libmp3lame --enable-libopencore_amrnb --enable-libopencore_amrwb --enable-libopenjpeg --enable-libopus --enable-libpulse --enable-libsoxr --enable-libspeex --enable-libssh --enable-libtheora --enable-libv4l2 --enable-libvidstab --enable-libvorbis --enable-libvpx --enable-libwebp --enable-libx264 --enable-libx265 --enable-libxcb --enable-libxml2 --enable-libxvid --enable-shared --enable-version3
  libavutil      55. 78.100 / 55. 78.100
  libavcodec     57.107.100 / 57.107.100
  libavformat    57. 83.100 / 57. 83.100
  libavdevice    57. 10.100 / 57. 10.100
  libavfilter     6.107.100 /  6.107.100
  libavresample   3.  7.  0 /  3.  7.  0
  libswscale      4.  8.100 /  4.  8.100
  libswresample   2.  9.100 /  2.  9.100
  libpostproc    54.  7.100 / 54.  7.100
Guessed Channel Layout for Input Stream #0.0 : stereo
Input #0, wav, from '002_1.WAV':
  Duration: 00:00:21.08, bitrate: 1411 kb/s
    Stream #0:0: Audio: pcm_s16le ([1][0][0][0] / 0x0001), 44100 Hz, stereo, s16, 1411 kb/s
Stream mapping:
  Stream #0:0 -> #0:0 (pcm_s16le (native) -> vorbis (libvorbis))
Press [q] to stop, [?] for help
Output #0, ogg, to '002_1.ogg':
  Metadata:
    encoder         : Lavf57.83.100
    Stream #0:0: Audio: vorbis (libvorbis), 44100 Hz, stereo, fltp
    Metadata:
      encoder         : Lavc57.107.100 libvorbis
Invalid return value 0 for stream protocol
    Last message repeated 1 times
size=     201kB time=00:00:21.07 bitrate=  78.3kbits/s speed=59.5x
video:0kB audio:196kB subtitle:0kB other streams:0kB global headers:4kB muxing overhead: 2.801595%
Final script, fresh from the oven! Link to heading
The following script encapsulates the audio files’ copy and compression operations, with some additions:
- rsync and ffmpeg commands are wrapped as shell functions for readability and modularity
- it is possible to specify a “volume number”, to store several loop collections:
- create 99 loops on the RC-30
- archive as: volume 1, loops 1 to 99
- reset (erase) the RC-30 filesystem
- create 99 loops on the RC-30
- archive as: volume 2, loops 1 to 99
- reset (erase) the RC-30 filesystem
- rinse and
repeatloop!
- create 99 loops on the RC-30